Step 1: Download and install device driver software on your computer.
If you have used Kingo android Root already, skip this step. Otherwise, do it manually. Following are ways to do this...
- Visit Samsung official website to find the correspondent driver software.
- Google the driver software of your device. Download and then install it on you computer.
- Download or update Kies, part of which will install or update drivers.
Once drivers are installed or updated, it is highly recommended that you restart your computer.
Step 2: Download and extract the Stock ROM (Official/Original Firmware).
SamMobilemay be the best choice to download stock firmware of Samsung device. Or you can go to Samsung Updates, XDA Forum or Google to find the correspondent firmware of your device.
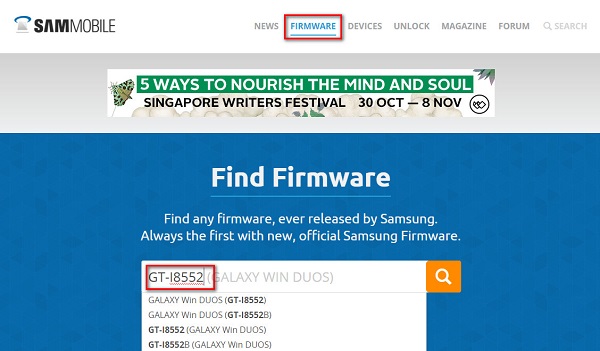
Click "Firmware" and enter your device model
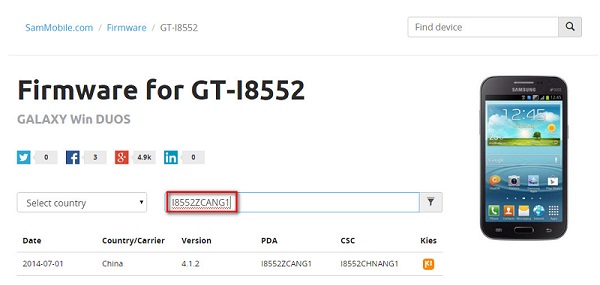
Select country or type in certain info to filter, eg.Baseband version.
After downloading it (normally a compressed file), you need to extact/unzip it to certain location of your PC. The file types that Odin uses are *.bin,*.tar and *.tar.md5.
https://www.kingoapp.com/image/gt-i8552-stock-firmware-md5-file.jpg

Find the file you have downloaded and then unzip it to Desktop.
 You will find a *.md5 file after extracting.
Step 3: Download and extract Odin on you PC.
You can download Odin V3.10.7 directly from SamMobile. AndroidMTK is a fine alternative, it also offers a detailed list of Odin versions and download link. Or you can always Google "Odin download". After downloading it on your PC, extract it to Desktop or another location you'd prefer.

Odin v3.10.7 zip file.
After extracting, right-click to "Open as Administrator". It may prevent certain issue from happening.
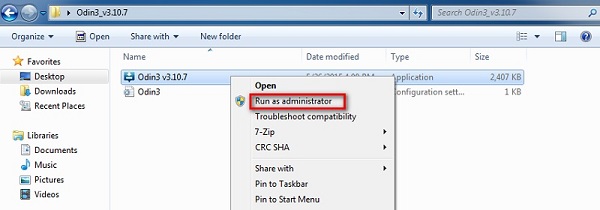
Run Odin as administartor is recommended.
Step 4: Boot your Samsung device into Download mode.
Follow these steps to enter Download Mode/Odin Mode
- Power off your device
- Press and hold Volume Down key, Home Key and Power Key
- When your device vibrates, release Power key while keep holding the Volume Down key and Home key
- Press Volume Up key to enter Download mode, which has a green robot figure and “Downloading… Do not turn off target!!)
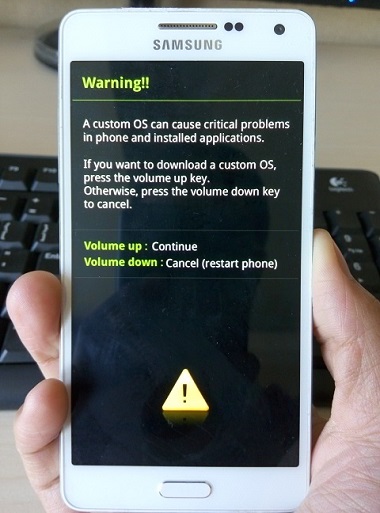
Warning before entering into download mode
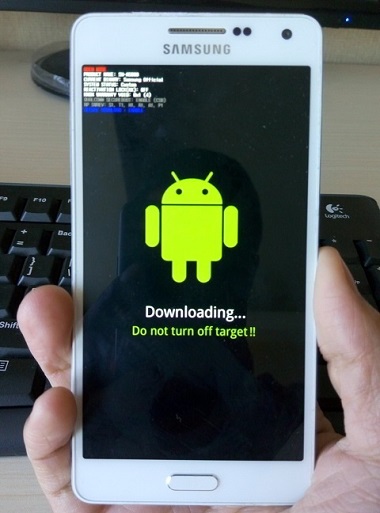
Now you are in download mode.
Step 5: Connect your device to PC.
You device should be automatically recognized by Odin. At the lower-left of Odin interface, it should show a message that says "Added!" and in the meantime you should see a light-blue box at the ID:COM section stating "COM:3" (the number depend on which USB port you have plugged the device cable and is irrelevant).
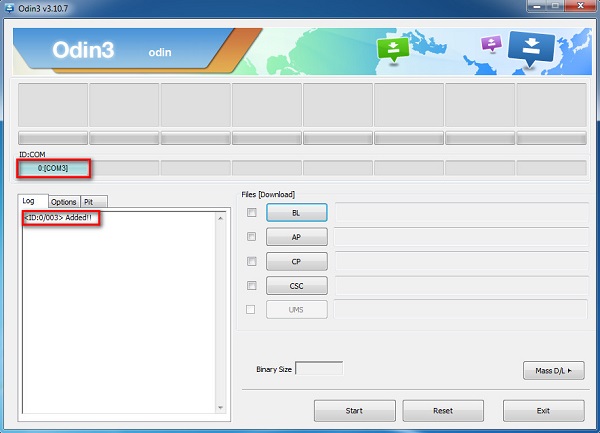
Device is connected to Odin.
Step 6: Click "PDA" or "AP" to add tar.md5 file that you have extracted and then "Start".
Whether it is "PDA" or "AP" depends on the version of Odin that you used. But the md5 file goes to either "PDA" or "AP".
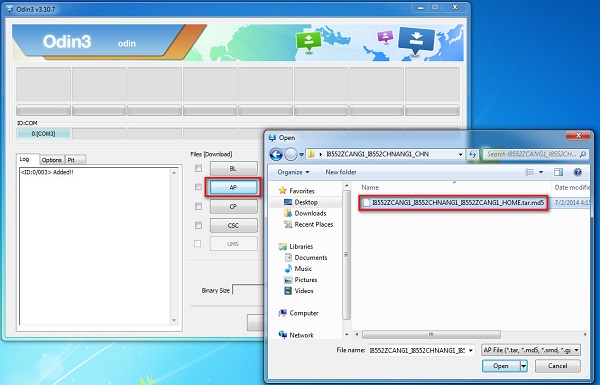
Add *.md5 to Odin.
After adding the file, click "Start" to begin the flashing process.
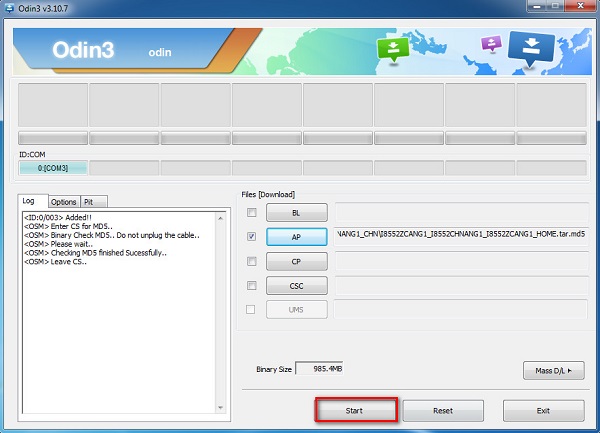
Click "Start" to flash.
WARNING DO NOT REMOVE OR OPERATE ON YOUR DEVICE UNTIL FINISHED OR FAILED IS SHOWED ON ODIN.
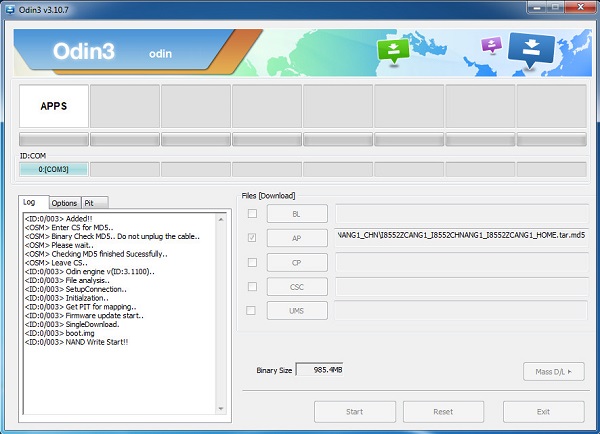
Ongoing flashing process. Do not remove your device.
When the flashing process is done and if everything goes well, you should see a big green box saying "RESET" or "PASSED" (depends on the version of Odin is used). By now, the device should be rebooted and it is safe to remove/unplug your device.

Flash succeeded.


No comments:
Post a Comment